


Re-
This is a version of the last method I showed, the last one was for projection and screen, this is for Print and needs to be at a lot higher resolution.
Start in the same way by opening the File>New dialogue box
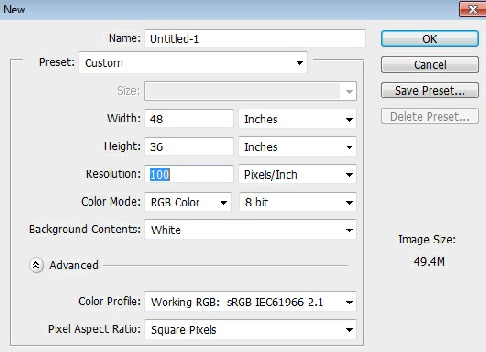
We have gone a little overboard here to show what’s possible by printing a 4 Ft X 3 Ft (48 Inch X 36 Inch) image!
Notice how low the PPI is.
You set PPI to give you 1Mb of file size (the bottom right hand of the dialogue box) per Inch of print size on the longest side. This ‘rule of thumb’ gives us the file size that the printer needs, what follows gives us the minimum amount of ‘interpolation’ to attain that size.
Interpolation is adding ‘invented’ pixels to pad out the file to print very large, the less interpolation the higher the image quality will be, there are limits.
This technique demands a large amount of ‘seed’ data to be successful, it doesn’t work with very small resolution images, and the images really need to be Raw files, but the images from your camera should be good.
Press the OK button and the New Canvas will open
Now we proceed as in the last tutorial by Placing our image from Bridge.
Open Bridge and highlight the image you want to use, then go to File>Place>In Photoshop as here
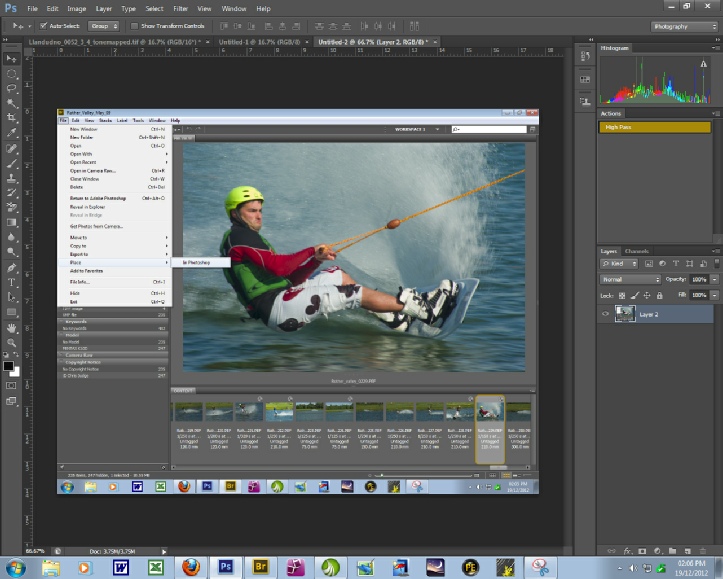
This is the screen in Photoshop after the image is placed, note how small it is (this was taken with a 10 Mp camera)
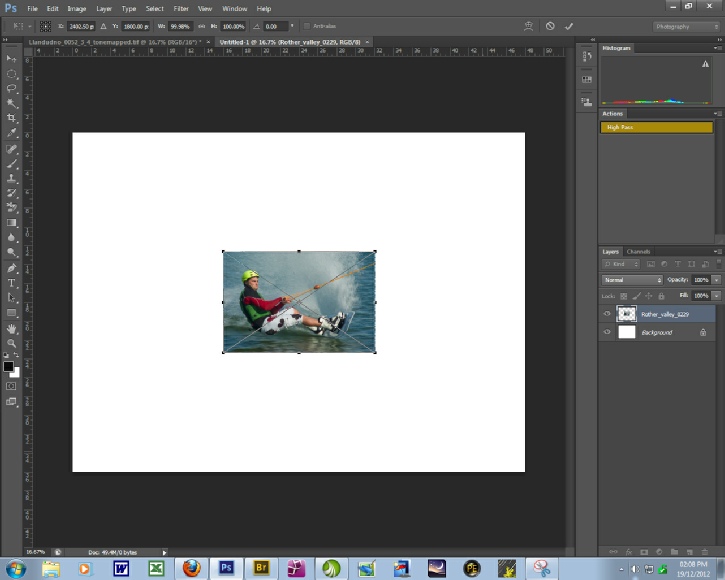
As before hold down the Shift Key and drag on any corner ‘Anchor Point’ and drag to fill the canvas, notice how I have had to crop the image to fit the new Aspect Ratio.
You can crop to have just part of the image, but you can’t go too far with this at this high resolution, you need to hang onto all the pixels you can.
You’ll get something like this.
Double Click inside the image or press the Enter key to accept the Transform,
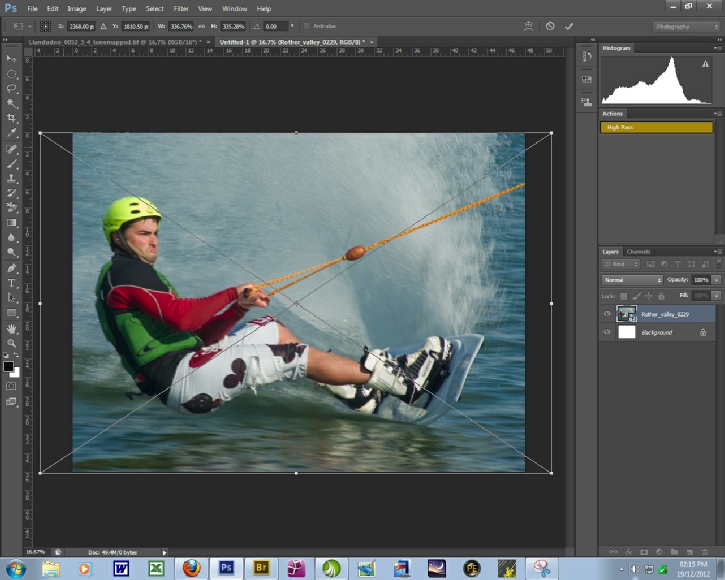
Now is the time to sharpen the image at the new resolution, I usually use High Pass Sharpening here.
After sharpening you can double click the Magnifying Glass icon in the Tool Bar on the Left to view the image at 100%, this is what the printer will lay down.
Now flatten the image, give it a new filename and save ideally as a 16bit Tiff if your print house accepts them, and your done.
There are a few caveats.
Your image needs to be as good as you can get it as any slight fault will be maximised on a large print, a canvas print with it’s texture can sometimes help to hide small faults, but burnt out skies, blurred image, images not in focus and other major faults will all be exaggerated in the print.
The image has had to be interpolated to get to this size, what this technique does is to minimise the interpolation needed.
With really good images you can print larger than this, but there are limits. The more pixels you start with the bigger you can go.
It’s also a good technique when printing smaller such as A3 or 20 Inches X 16 Inches.
Home : Articles : Resizing : Resizing 02
A few Notes About DPI and PPI
There is a lot of misinformation around, they are NOT the same thing. DPI is the resolution of the PRINTER. It’s the resolution the printer will print the file at no matter what the PPI is set to.
What the formula 1Mb of file size for every Inch of print on the longest side does is it ensures a file size that closely matches what the printer driver needs, it’s slightly too much as it is correct for a square image. It assumes a printer set for around 300DPI and an 8bit sRGB image.
You will hear of 300 PPI/DPI as the best which is just plain wrong. If we were to save this image at 4ft X 3ft @300ppi the image file would be 444.9Mb, this would need a ton of interpolation, there would be more ‘invented’ pixels than genuine data so image quality would suffer. Not only that, but the printer driver would ‘dump’ most of that extra data as all it needs, all it can actually print, is 48Mb of data.
PPI is the resolution within the file and how the data in the file is shown on a monitor. PPI works by altering the size of the pixels. Every time you zoom into an image you’re altering PPI.
Altering PPI does NOT effect the data, just how it is displayed on a screen or saved in a file, it’s a variable.
What throws people is the Pixels per Inch, screens are not all one size the size varies resolution stays the same or similar. The Inch in PPI is just a standard for comparison purposes, in reality the Inch in PPI varies.
In the above article I set the PPI to 100 as this is what is required for this size of print, this means that on the print every pixel will still only be 1/100th of an Inch square, which is tiny. Add to that the printer will ‘dither’ the image to give continuous tones so you don’t see pixels in the print.
For images on the Web or a screen the standard is 72 PPI so we can use small files. This is the default for Jpeg’s in Photoshop, the default for Raw files is 240 PPI, these PPI are arbitrary values and can be altered, and are being altered all the time.